How to rename detectors in bulk?
Rename hundreds of detectors at once to match your project's tag numbers, by exporting them to Excel, renaming them there and importing them back.
4 min read
An optimised layout can hold many detectors, named Detector 1, Detector 2, Detector 3 and so on. The client will want each one named to the project’s tag numbers before anything goes in the report. Renaming them one at a time in the tree takes hours. With Excel, it takes minutes, and you can use a formula to number them all in one go.
Step 1: Export the detectors
- In the area tree, select the configuration whose detectors you want to rename.
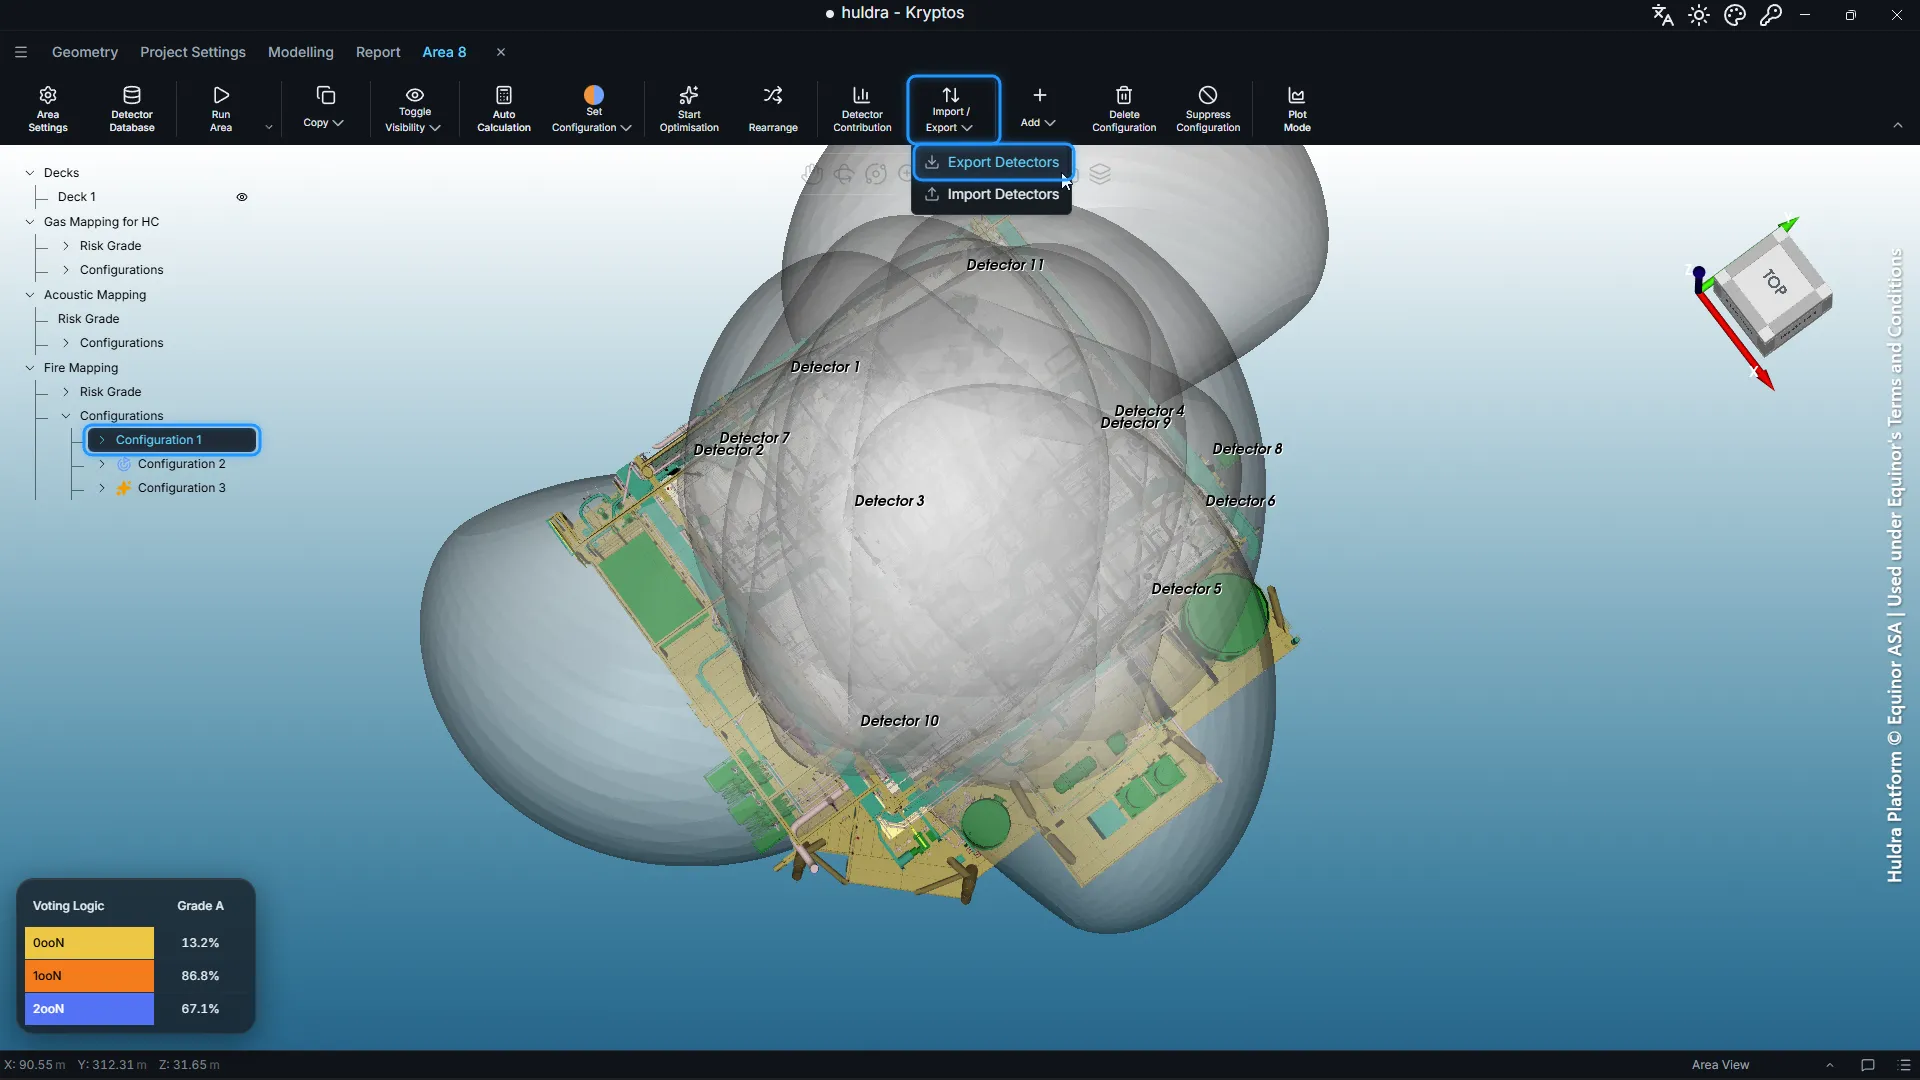
- In the ribbon, click Import / Export, then Export Detectors.
- Choose where to save the workbook. Kryptos names it after the configuration, such as Configuration 1_detectors.xlsx.
The workbook holds every detector in the configuration, with its name, its position and, for fire detectors, which way it faces and how far it tilts.
Step 2: Rename them in Excel
Open the workbook and change the names in the Detector Name column. Leave everything else as it is: the sheet name, the column headings and the numbers in the other columns. Those numbers are where each detector sits and how it is aimed, and Kryptos reads them back exactly as they are.
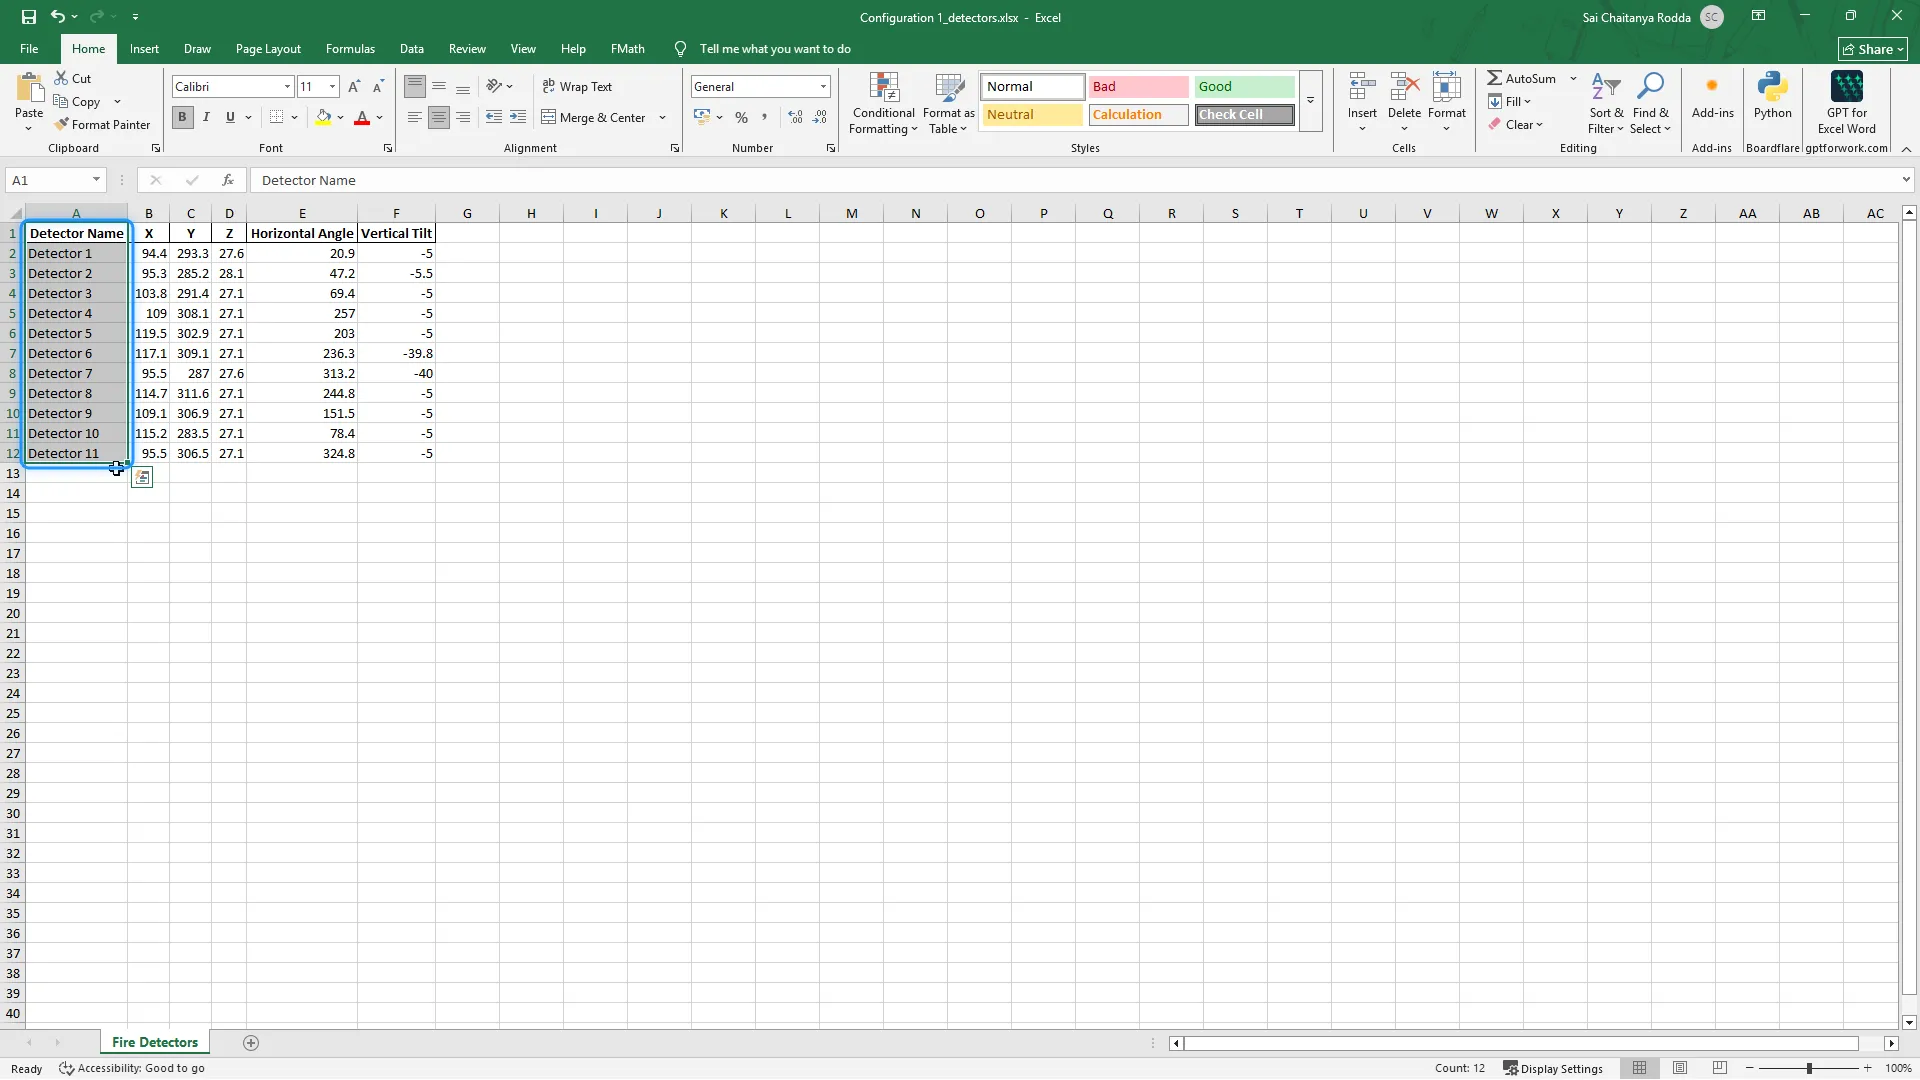
You can type the names one by one, paste them from the project’s tag list, or let a formula do it.
Number them with a formula
To name the detectors in sequence, type a formula in the first name cell (A2) and fill it down to the last detector. For example:
="FD-"&TEXT(ROW()-1,"000")
gives FD-001, FD-002, FD-003 and so on. ROW()-1 turns row 2 into 1, row 3 into 2, and so on, and "000" pads the number to three digits. Change "FD-" to your own prefix, such as an area or system code.
When the names look right, copy the column and paste it back as values, so the cells hold the names and not the formula. Then save the workbook.
Tip: Sort the rows first if you want the numbers to follow a pattern, such as along the deck from one end to the other. Sort by the X or Y column, then fill the formula down.
Step 3: Import them into a new configuration
- Back in Kryptos, select Configurations under the same mapping and click Add Configuration. A new, empty configuration appears.
- Select the new configuration.
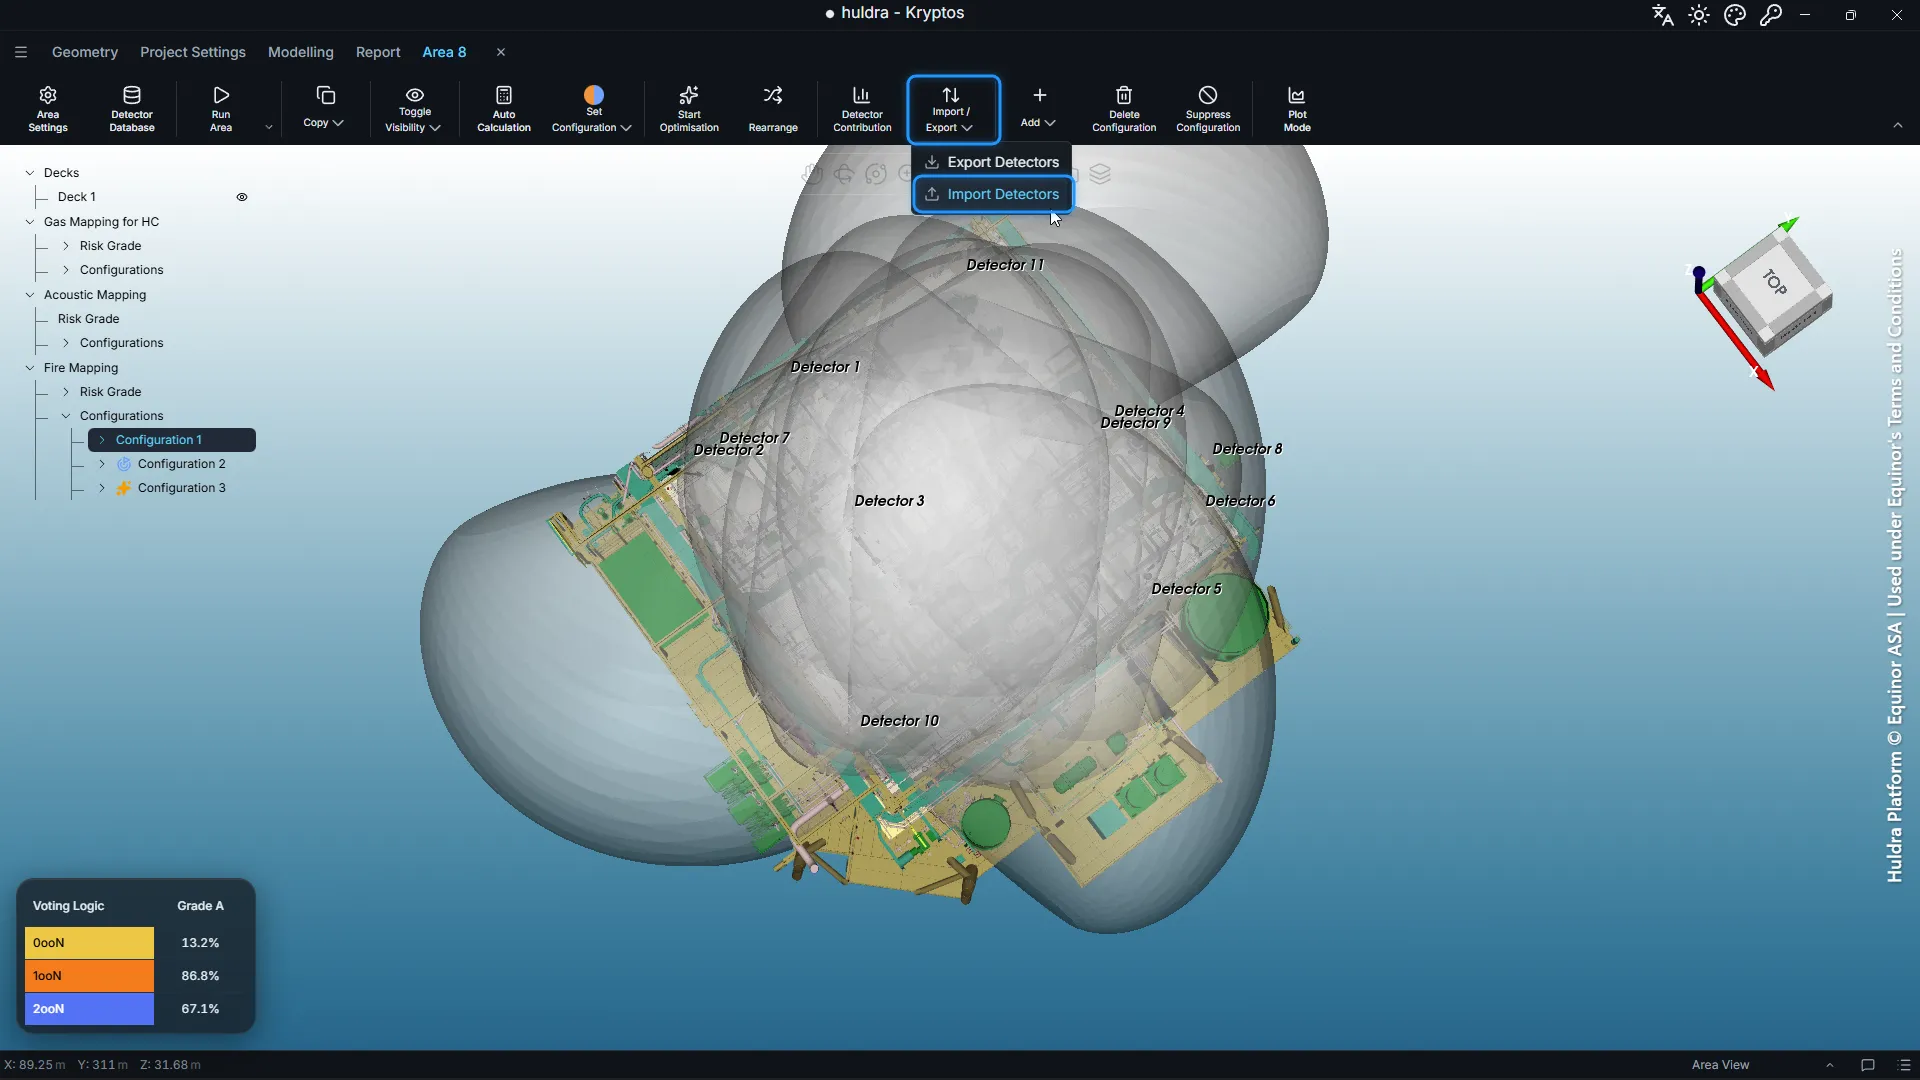
- Click Import / Export, then Import Detectors.
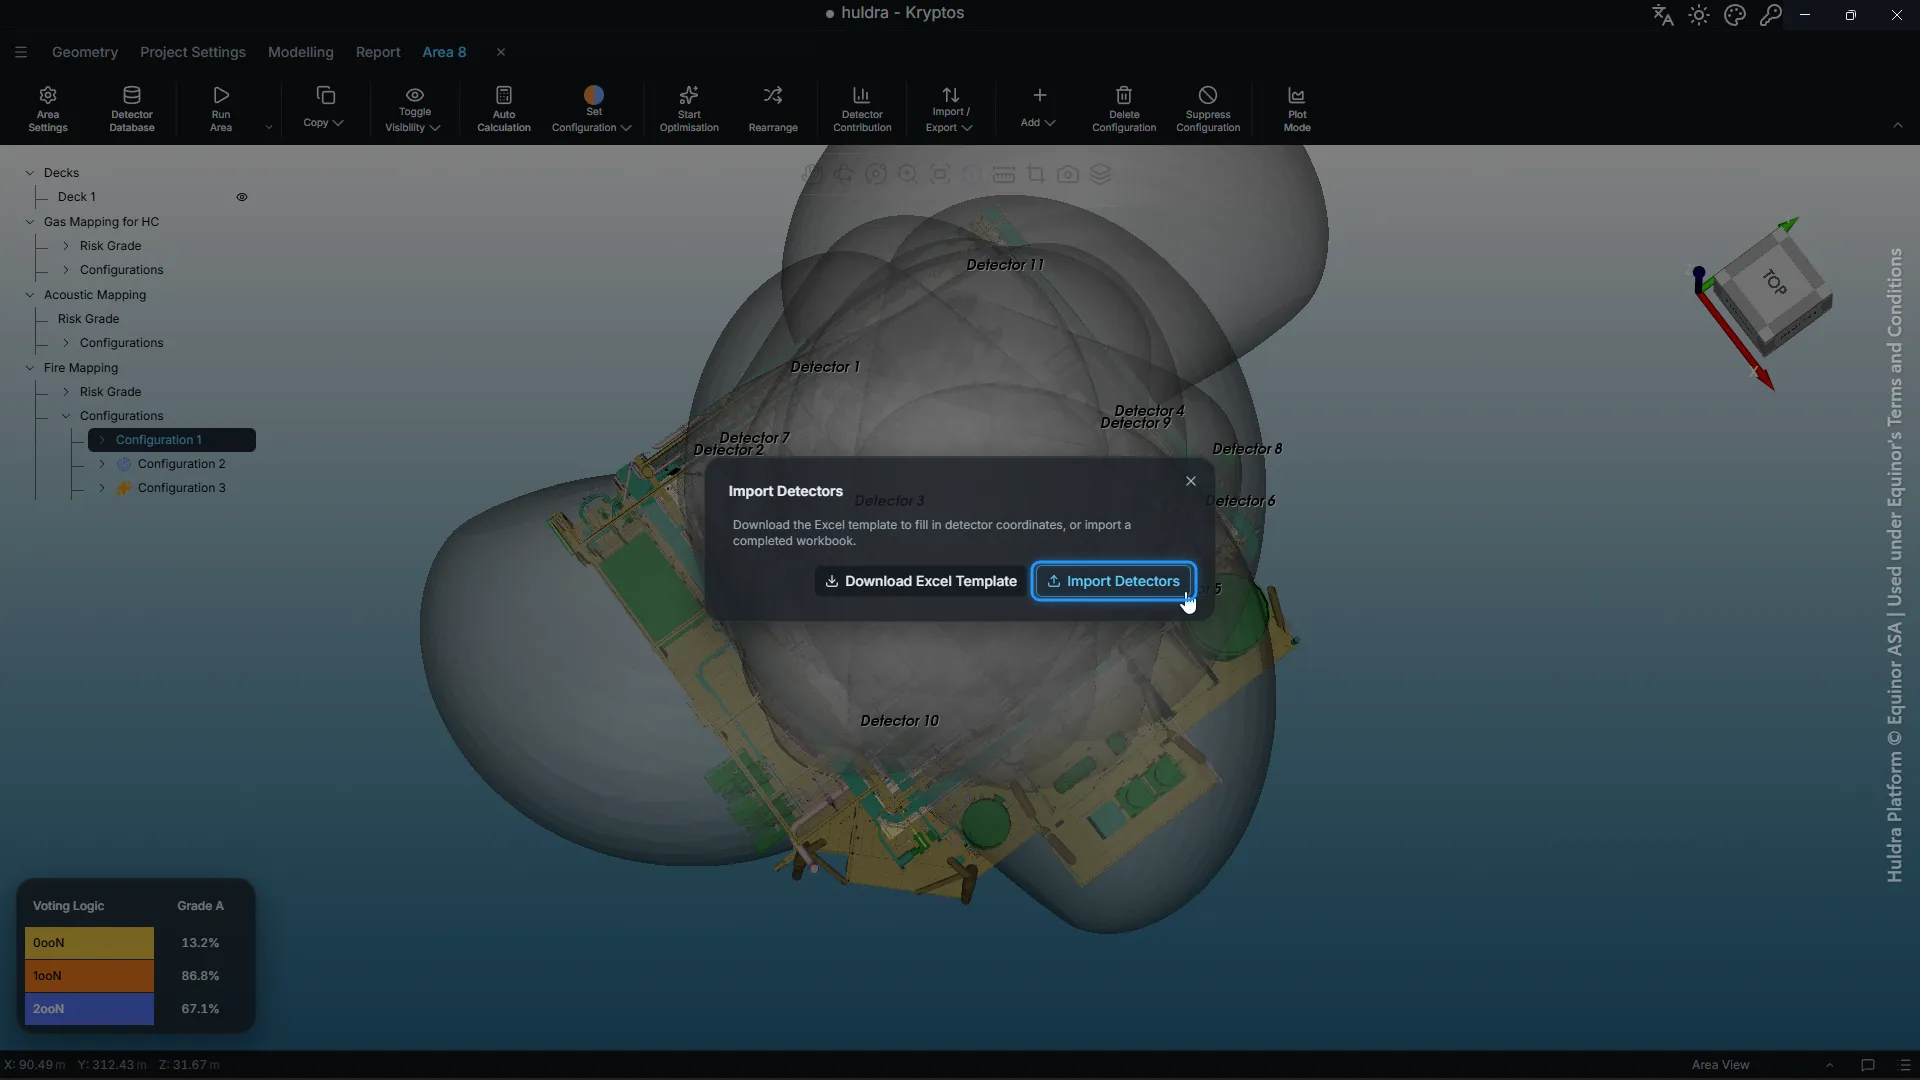
- In the window that opens, click Import Detectors and choose your workbook.
The new configuration now holds the same detectors, in the same places, aimed the same way, with the new names. To calculate its coverage, click the arrow next to Run Area and choose Run Specific Configuration. It matches the old configuration, since only the names changed.
Tip: Always import into a new, empty configuration. Importing adds detectors and never replaces them, so importing into the configuration you exported from gives you every detector twice.
Step 4: Tidy up
- If the old configuration was the Preliminary Configuration or the Final Configuration, select the new one and set it the same way with Set Configuration. The report uses whichever configuration is set, so this is what puts the new names in the report.
- Delete the old configuration, or keep it as a record. You can delete it only once it is no longer the Preliminary Configuration or the Final Configuration.
- Detectors come back unlocked and switched on. Lock again any detector that must stay where it is.
What is in the workbook
| Sheet | Columns |
|---|---|
| Point Detectors | Detector Name, Component, X, Y, Z |
| Open Path Detectors | Detector Name, Component, X1, Y1, Z1, X2, Y2, Z2 |
| Fire Detectors | Detector Name, X, Y, Z, Horizontal Angle, Vertical Tilt |
Gas configurations have the first two sheets, and fire configurations have the third. A row with a missing coordinate is skipped, and Kryptos tells you how many were skipped. A row with an empty name gets a name from the configuration’s detector prefix, below.
The same workbook works for detectors that never came from Kryptos. Click Download Excel Template in the Import Detectors window for an empty one, fill it in from a detector schedule or another tool, and import it the same way.
Name new detectors as you go
For detectors you add by hand or with the optimiser, you can set the names before they are placed. Select Configurations under the mapping and click Detector Prefix in the ribbon. With a prefix of FX101, new detectors are named FX101 1, FX101 2, FX101 3 and so on, with a space before the number.
A prefix gets you close to the tag numbers, but not all the way. For tags such as FD-001, with leading zeros and no space, rename in Excel as above.
For more on adding, locking and naming detectors, see Adding Detectors in the Kryptos documentation.
Credits and acknowledgements
The plant model in this post is the Huldra platform, © Equinor ASA, used under Equinor’s Terms and Conditions. Our thanks to Equinor for making the Huldra data openly available, which lets us show Kryptos working on a real offshore platform.
Every screenshot that shows the model carries this credit. Equinor has not reviewed or endorsed this post or Kryptos.
Model credit: Huldra Platform © Equinor ASA | Used under Equinor's Terms and Conditions